Garage Door Opener Troubleshooting: Simple Fixes, Smart Maintenance, and When to Call a Pro
A faulty garage door opener disrupts your day and can be a safety hazard if the door won’t open, reverses unexpectedly, or acts erratically. This guide walks you through the most common causes — from power and wiring problems to misaligned safety sensors and worn drive parts — and gives clear, step‑by‑step troubleshooting so you can diagnose, fix, and maintain reliable operation. You’ll learn how to test power and remotes, align and clean photo‑eye sensors, spot drivetrain failures when the motor runs but the door doesn’t move, and safely reset or reprogram remotes and keypads. The article lays out a fast repair path with easy DIY fixes, routine maintenance tips to reduce wear, and clear signs that mean it’s time to call a technician. If you’d rather leave it to a pro, Overhead Door Company of Sacramento Inc. offers local service, repairs, free estimates, and financing across the Sacramento area — see our service details later in the article. What follows: rapid diagnosis, sensor checks, motor/drive troubleshooting, reset and reprogram steps, noise and wiring fixes, and guidance on getting professional help.
Why Is My Garage Door Opener Not Working? Common Causes and Quick Checks
Most opener failures come from a few predictable sources: no power, weak remote batteries, misaligned safety sensors, track obstructions, or a tripped breaker. Knowing which system is at fault — electrical, electronic, or mechanical — helps you decide the safest next step. This section gives immediate checks you can do to pinpoint the likely cause and decide whether a do‑it‑yourself fix is appropriate or if you should call a technician. Do the quick checks in order to avoid unnecessary disassembly and reduce safety risks before moving on to deeper diagnostics.
Quick checks to run immediately:
- Test the wall switch: Press the wall‑mounted button to see if the opener responds — this separates remote problems from opener issues.
- Check power and indicators: Confirm the outlet has power, look for status lights on the motor unit, and reset any GFCI outlets that serve the garage.
- Inspect sensor LEDs and track obstructions: Make sure the safety sensor LEDs are lit and remove any debris or objects blocking the sensor beam.
These simple checks usually narrow the issue to power, remote, or sensor problems and get you ready for the more detailed steps that follow.
Use the diagnostic table below to match what you see with likely causes and first‑step DIY checks so you can prioritize safe fixes or escalate to a professional.
| Problem | Likely Cause(s) | Quick DIY Check | When to Call a Pro |
|---|---|---|---|
| Opener has no power | Tripped breaker, GFCI, bad outlet, unplugged unit | Test the outlet with a lamp; reset GFCI; check breaker panel | If outlet is live but the motor unit shows no signs of life or has a burnt smell |
| Remote works intermittently | Weak batteries, interference, failing transmitter | Replace batteries; watch the remote LED; try a spare remote | If fresh batteries and reprogramming don’t help |
| Door reverses without obstruction | Misaligned sensors or wiring faults | Check sensor LEDs and wiring; clean the lenses | If alignment and cleaning don’t stop the reversals or wiring is damaged |
| Motor runs but door doesn’t move | Disengaged trolley, broken belt/chain, stripped gear | Inspect carriage, check belt/chain tension, listen for grinding | For internal gear or motor replacement, contact a technician |
| Loud grinding or scraping | Worn gears, damaged rollers or tracks | Lubricate moving parts; inspect rollers and track alignment | If noise continues after maintenance or parts are visibly damaged |
How to Check Power Sources and Circuit Breakers for Garage Door Openers
Start with power: without it the opener won’t run and that’s often the easiest problem to confirm. Test the outlet feeding the opener by plugging in a known working device or a lamp. If the outlet is dead, reset any GFCI or tripped breaker for the garage circuit. Look at the motor unit for status lights or error indicators — these often point to low‑voltage wiring issues or thermal cutouts. If the outlet has power but the opener shows no life, don’t open the motor housing; call a licensed electrician or technician to avoid electrical hazards.
Once you’ve confirmed basic electrical supply, inspect wiring connections at the wall switch and motor unit, keeping safety in mind as you proceed to sensor and control checks.
What Are the Signs of Dead or Weak Remote Control Batteries?
Dead or weak remote batteries are a common, easy fix. Typical signs are no LED when you press the button, inconsistent range, or the wall switch working while the remote does not — which tells you the opener itself is fine. Swap in fresh batteries and test again. If the remote’s LED stays dim or range doesn’t improve, check for water damage or a failing transmitter. If a new battery and reprogramming don’t work, try a spare remote or contact a service provider for replacement.
Ruling out remote battery problems early saves time and avoids unnecessary checks of sensors or mechanical parts.
How Do I Troubleshoot and Fix Garage Door Safety Sensor Problems?
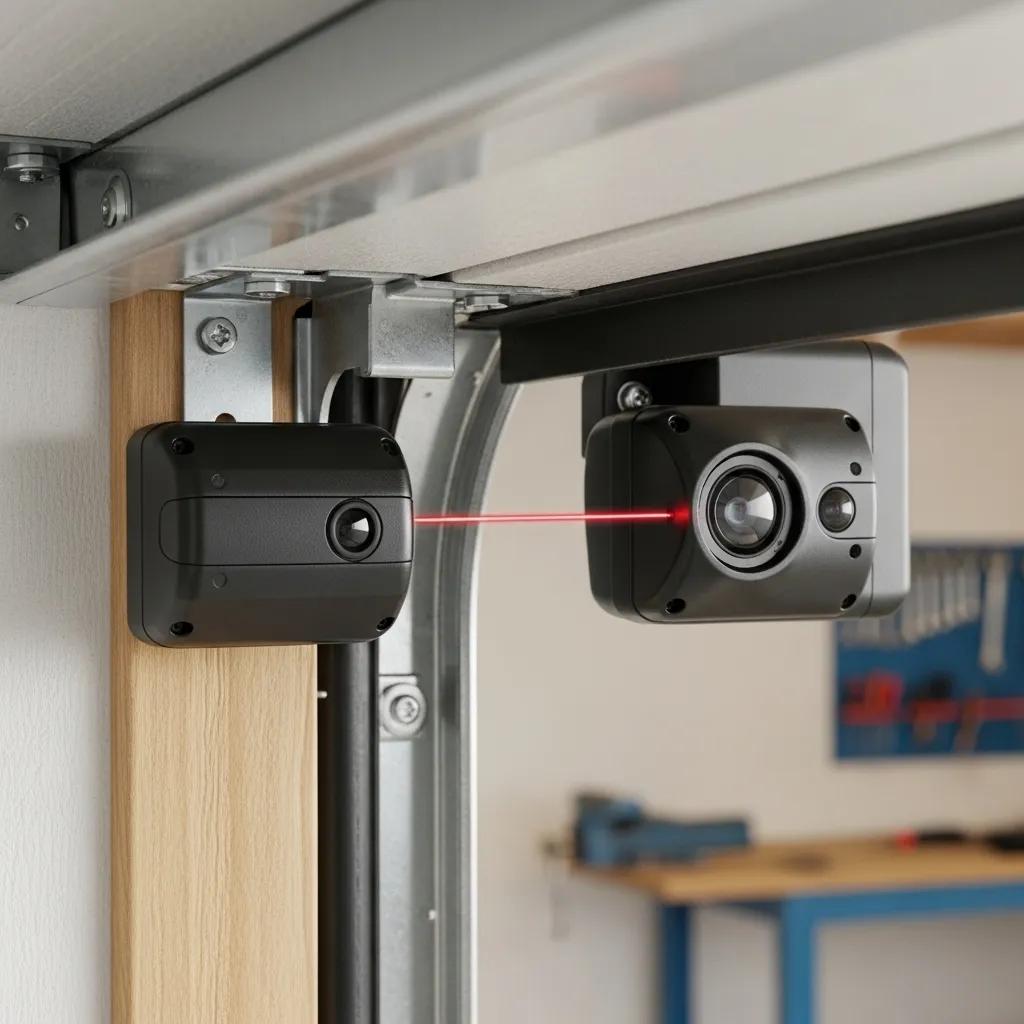
Safety sensors (photo eyes) keep the door from closing on people or objects by creating an infrared beam across the opening. Dirty lenses, misalignment, or damaged wiring will often cause the opener to refuse to close or to reverse unexpectedly — the sensors are doing their job. This section shows how to spot alignment issues, clean the lenses correctly, test sensor wiring, and when to replace sensors or call a professional. Proper diagnosis restores safe operation and stops repeated automatic reversals.
Start with alignment — it’s the most common sensor problem and often the quickest fix.
How to Identify and Correct Misaligned or Obstructed Safety Sensors
Misalignment or obstructions usually show as one sensor LED off or both LEDs blinking; the opener will typically refuse to close or show an error. Remove cobwebs and debris with a soft, dry cloth, then check that the sensor housings face each other with an unobstructed line of sight. Slightly loosen the mounting brackets, nudge the sensors until both LEDs are steady, tighten the fasteners, and test by closing the door and waving an object through the beam to confirm reversal. If LEDs still flicker or stay off, inspect wiring for corrosion or loose connections and consider professional replacement if needed.
Correct alignment cuts down false reversals and makes routine cleaning more effective.
What Are the Steps to Clean and Maintain Garage Door Safety Sensors?
Keep sensors clean to prevent dust and moisture from causing false readings. Every few months (and after dusty projects), wipe lenses with a soft microfiber cloth lightly dampened with water or mild soap, avoid solvents or abrasive cleaners, and dry the lenses before testing. While you’re cleaning, check mounts for rust, loose screws, or signs of rodent damage to wiring, and note any wear so you can plan replacement or professional inspection. Regular cleaning and inspections extend sensor life and reduce emergency calls.
Keeping a simple cleaning schedule and quick inspection notes helps catch slow deterioration before it becomes a problem.
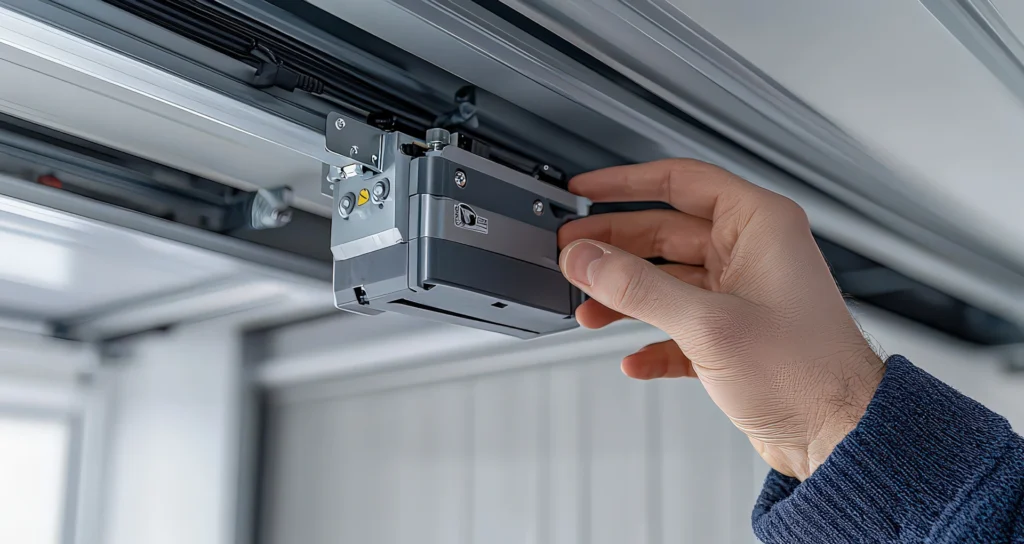
What Causes the Garage Door Opener Motor to Run but the Door Not to Move?
If the motor runs but the door doesn’t move, the issue is usually mechanical — a disengaged trolley, broken belt or chain, stripped gears, or a disconnected carriage. The motor is producing power but the drivetrain isn’t transferring motion, which you may hear as grinding, slipping, or a humming sound while the door doesn’t travel. This section walks through safe checks to separate motor from drive problems and explains which repairs are homeowner‑friendly (like re‑engaging the trolley) and which need a technician (internal gears or motor replacement). Knowing the parts (motor, gear, belt/chain, trolley) helps you decide whether to schedule service.
Start with external visual and listening checks before attempting any internal inspection.
How to Diagnose Broken Drive Gears, Chains, or Belts in Garage Door Openers
Listen for grinding, scraping, or slipping near the motor — that often points to stripped gears or a failing belt/chain. Inspect belts and chains for visible breaks, worn links, or excess slack and check the trolley and carriage connection to see if it’s engaged; use the manual release to operate the door by hand and confirm whether the drivetrain is at fault. Internal gear replacement and motor disassembly use specialized tools and can affect warranties, so avoid DIY internal repairs unless you have manufacturer parts and clear instructions. If parts need replacing, hire a pro to ensure correct alignment and safe reassembly.
If external fixes don’t restore movement, stop and call a technician rather than risk further damage or voiding warranties.
When Should You Call a Professional for Motor or Drive System Repairs?
Call a professional when you see stripped internal gears, a seized motor, broken belts or chains that need replacement, or a carriage assembly with significant wear — these usually require factory parts and trained technicians. Red flags include smoke, burning smells, repeated breaker trips, or any repair that means opening the motor housing; those indicate electrical or mechanical issues that are unsafe for DIY work. A certified technician can assess the damage, recommend repair or replacement, provide service if needed, and help preserve any warranty coverage.
| Component (motor/gear/drive) | Symptom | Diagnostic Step | Repair Complexity / Estimated Action |
|---|---|---|---|
| Motor | Hums but no torque | Use manual release; listen for motor noise | High — may need motor replacement by a technician |
| Drive gear | Grinding, slipping | Look for metal shavings and wear | High — internal gear replacement recommended |
| Belt/chain | Excessive slack or break | Check tension visually; test trolley manually | Medium — belt/chain replacement can be technical |
| Trolley/carriage | Disengaged from door | Check manual disconnect and re‑engage | Low — usually re‑engage trolley and inspect connectors |
How Can I Reset and Reprogram My Garage Door Opener and Remote Controls?
Resetting and reprogramming fix desynced remotes, add new transmitters, or clear interference after battery changes. Most openers use a manufacturer ‘Learn’ or ‘Program’ button on the motor unit to accept transmitters; a simple power‑cycle and a full ‘Learn’ reset have different effects on paired remotes and keypads. This section gives universal reset steps, safety reminders, and general reprogramming sequences that work for most major brands — but consult your model manual for exact button locations and timing. Use these procedures to restore remote control without changing mechanical limit settings.
Always create a safe environment first: make sure the door is closed and no one is near moving parts before resetting or reprogramming.
What Is the Step-by-Step Process to Reset a Garage Door Opener Safely?
For a safe reset, first isolate power: unplug the motor unit or switch off the circuit, wait 10–30 seconds, then restore power to clear transient faults. This power cycle often resets electronics without erasing paired remotes. To fully clear remotes, find the ‘Learn’ button on the motor housing and follow the manufacturer’s instructions — usually pressing and holding until an indicator blinks to erase all devices, then re‑learning each transmitter. Remember: a full reset removes every paired remote and keypad, so be ready to reprogram the devices you use. After any reset, confirm the door path is clear and safety sensors are aligned to prevent unintended movement.
Once reset, follow the reprogramming steps for remotes and keypads described below.
How to Reprogram Garage Door Remotes and Keypads Effectively
To reprogram, press the motor unit’s ‘Learn’ button, then press the remote button within the required time window to pair. Keypads often use a specific code or sequence that varies by model. If programming fails, check the remote battery, confirm frequency compatibility with your opener, and move away from sources of interference. Rolling‑code systems require precise timing, so follow the manual’s steps exactly; if you miss the window, simply restart the sequence. If a remote or keypad won’t pair after several attempts, it may need replacement or a technician can test the receiver circuitry.
Successful reprogramming restores secure access and keeps rolling‑code protections working against unauthorized entry.
What Are Effective DIY Fixes for Noisy or Malfunctioning Garage Door Openers?
Many noisy openers respond well to routine maintenance: lubricate moving parts, tighten loose hardware, and replace worn rollers or hinges to cut vibration and stress on the opener. DIY fixes should focus on external components and routine checks that don’t require opening the motor housing — clean tracks, replace rollers, adjust chain/belt tension per the manufacturer’s specs, and make sure mounting fasteners are tight. This section lists safe maintenance steps, recommended lubricants, and basic wiring inspection tips homeowners can do to reduce service calls and extend opener life. Regular preventive care prevents many common failures and keeps the system running smoothly.
Begin with lubrication and tightening hardware to address most noise and misalignment problems before moving to wiring checks.
How to Lubricate and Maintain Garage Door Opener Components for Quiet Operation
Use a silicone or Teflon‑based spray on rollers, hinges, and bearing points — avoid greasing tracks since that attracts dirt. Don’t attempt torsion spring work unless you’re qualified; springs are dangerous. Lubricate every six months or after heavy use, and inspect rollers for flat spots or corrosion that mean replacement rather than lubrication. Tighten loose bolts on tracks and opener mountings to reduce vibration, and check door balance so the opener isn’t under excess load. Proper lubrication and hardware care cut noise and extend component life.
Regular maintenance means fewer emergency repairs and smoother daily operation.
How to Troubleshoot Wiring Issues and Electrical Connections in Openers
Start wiring checks with a visual inspection: look for loose or corroded terminal screws at the motor unit, wall switch, and sensor housings, and make sure low‑voltage wires are seated firmly in their connectors. Don’t measure voltage or continuity unless you’re comfortable and qualified; for most homeowners, tightening and cleaning connections resolves intermittent signals and sensor faults. If you discover damaged insulation, rodent chews, or arcing marks, stop DIY work and schedule a professional electrical repair to avoid fire or shock hazards. For control‑board or other complex electrical problems, call a certified technician.
Keeping wiring tidy and secure protects safety systems and the opener’s electronics, preventing erratic behavior and costly failures.
| Task | Frequency | Tools/Materials | Benefit |
|---|---|---|---|
| Inspect sensor alignment and lenses | Every 3 months | Soft cloth, mild cleaner | Prevents false reversals and safety faults |
| Lubricate rollers and hinges | Every 6 months | Silicone/Teflon spray | Reduces noise and wear on moving parts |
| Check belt/chain tension and fasteners | Annually | Wrench set, tension gauge if available | Ensures smooth power transfer and prevents slippage |
| Visual wiring inspection | Annually or when issues appear | Flashlight, small screwdriver | Identifies loose terminals and rodent damage early |
When Should I Call a Professional Garage Door Opener Repair Service in Sacramento?
Certain problems need immediate professional attention because they’re unsafe or require specialist tools and parts. Call a pro for visible spring or cable failure, doors off the track, repeated electrical faults that trip breakers, smoke or burning smells, or drivetrain and motor failures that require disassembly. Local providers offer repairs and OEM parts plus warranties that DIY fixes can’t match. Below is a short checklist of warning signs and what to expect when you book service with an authorized local distributor who provides trained technicians and free estimates.
If you see an urgent symptom, stop using the door and secure the area until a technician arrives.
What Are the Warning Signs That Require Expert Garage Door Repair Assistance?
Watch for: a snapped torsion spring or visible cable failure, a door badly off its track, smoke or a burning electrical odor from the motor, and repeated automatic reversals that won’t clear with cleaning. If the door won’t stay closed or won’t latch after multiple resets, that indicates a safety or mechanical failure needing professional inspection. Any situation involving exposed springs, cables, or electrical arcing should be handled by a technician — evacuate the immediate area and don’t attempt DIY repairs. Prompt professional service reduces injury risk and prevents further damage.
Spotting these red flags early minimizes downtime and ensures repairs are done safely and correctly.
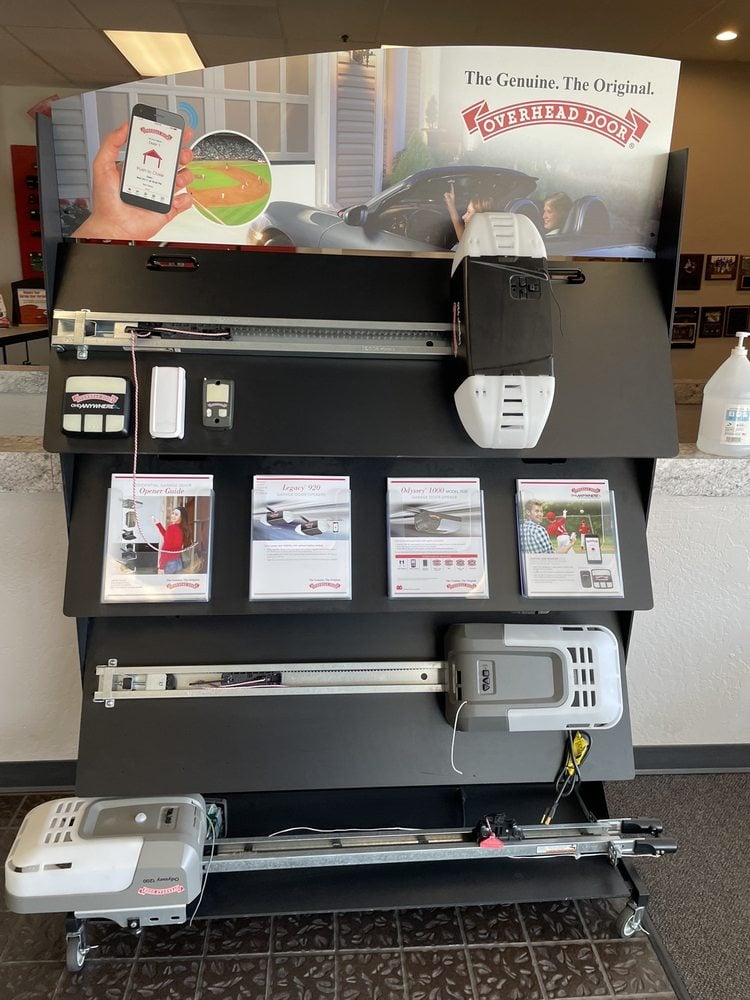
How Overhead Door Company of Sacramento Provides Reliable Repair Services
Overhead Door Company of Sacramento Inc. serves homes and businesses across Sacramento and neighboring counties as the authorized Overhead Door™ distributor for the region. We handle sales, installation, repair, and parts for a wide range of garage door systems. Our trained technicians arrive in uniform in fully equipped service trucks to perform scheduled service and free estimates. We also offer financing to help with larger repairs or replacements. As the authorized distributor, we can source OEM replacement parts and follow manufacturer best practices to protect safety and warranty coverage. For complex problems like broken springs, seized motors, or stripped gears, contact us to request a quote or schedule service promptly.
Frequently Asked Questions
1. How often should I perform maintenance on my garage door opener?
Regular maintenance keeps your opener reliable. Inspect and clean safety sensors every three months, lubricate rollers and hinges every six months, and check belt or chain tension annually. Also visually inspect wiring and components whenever you notice issues. A simple routine prevents unexpected breakdowns and can save time and money on repairs.
2. What should I do if my garage door opener makes unusual noises?
Unusual noises like grinding, scraping, or rattling usually mean worn or damaged parts. Start by lubricating moving parts and tightening loose hardware. If the noise continues, check rollers, tracks, and the drive system for wear or misalignment. If internal gears or the motor are involved, call a professional. Addressing noise early prevents bigger problems.
3. Can I replace garage door opener parts myself?
Some parts are homeowner‑friendly — batteries, sensors, and rollers in some cases — but internal repairs (motors, internal gears, springs) should be handled by professionals. If you’re comfortable with basic tools and follow clear instructions, minor repairs are possible. Be aware that DIY work can void warranties or create safety risks, so weigh your options carefully.
4. How can I tell if my garage door opener needs to be replaced?
Consider replacement if you have frequent malfunctions, persistent unusual noises, or if the opener no longer responds to remotes or the wall switch. If the motor runs but the door won’t move, or parts show visible damage, replacement may be the best option. Also think about upgrading if the opener is 10–15 years old — newer models add safety, security, and convenience. A professional can help you decide.
5. What safety features should I look for in a new garage door opener?
Prioritize automatic reversal systems and photo‑eye sensors that prevent the door from closing on people or objects. Look for rolling‑code technology to reduce the risk of unauthorized access and consider a battery backup for operation during power outages. These features improve safety and give you peace of mind.
6. How can I improve the range of my garage door remote?
First, replace the remote battery if range is limited. Remove obstructions between the remote and opener and try reprogramming the remote. If range still isn’t sufficient, consider relocating the opener’s antenna or upgrading to a remote with longer range or a smart opener that uses a phone app.
7. What should I do if my garage door opener is stuck in the closed position?
If the door is stuck closed, check power first — tripped breakers or unplugged units are common causes. Inspect safety sensors for obstructions or misalignment, which can prevent opening. If the opener is unresponsive, use the manual release to open the door by hand. If those steps don’t work, the problem may be more serious and you should call a professional to avoid damage or injury.
Conclusion
With the right checks and a little routine care, most garage door opener problems are solvable and your system can be returned to safe, reliable operation. Use the DIY steps here for simple fixes and maintenance, and call a professional for complex or dangerous issues. If you need help, Overhead Door Company of Sacramento Inc. is ready to provide expert service, fast repairs, and dependable advice to keep your garage door working smoothly.